For this preparation tutorial you need to downloade Robin Wood and Chip Midnights free templates - you can find the links under the links on the left of this page.
I work in CS2 but the steps should be very similar if you use a newer or older version of photoshop or Gimp. Also I work with .psd files for this tutorial and can't help you with the .jpg files as I simply havent looked at them *smiles*
Ok lets start. Open your graphics programme and Robins head layer and Chips head layer. I've put mine up like this and made the layers palette larger so it is easy for you to see what i mean.
Ok lets start. Open your graphics programme and Robins head layer and Chips head layer. I've put mine up like this and made the layers palette larger so it is easy for you to see what i mean.
(front pic is Robins and back layer is Chips)
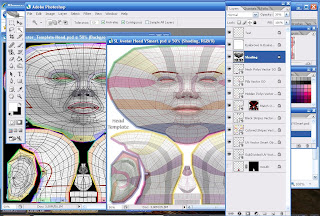
Now create a new document make it 1024 x 1024 pixels. Keep the other two docs open aswell. What you have as the starting layer doesnt matter, we will end up deleting it so you dont have too many layers you dont need.
For a couple of minutes forget chips template we will work with his in a few moments. So have Robins template and your template in clear view. Now click the following layers on robins holding ctr down (this way you are selecting more layers at once and the transfer will go faster).
The layers you need to select are all those below the shading layer (you might want the shading layer aswell it's completely up to you). see the pic below
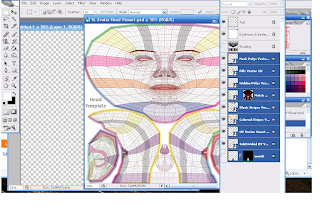 Now hold shift down and left-click your marked layers and drag them to your 1024 x 1024 layer once there release the left mousebutton and shift. (using shift to do this places the dragged layers in the same posistion in your new file as they were in the old one). Close Robins template you dont need it any more (remember to save your own template however ex. Head Template.psd - Keep it .psd!!! never save it as anything else or you wont be able to work with it as you want later on.
Ok from Chips template you need everything except the background layer. Repeat the steps you just did with Robins layer and drag the selected layers to your own template (I've put them below the layers from Robin to make it easier for myself). Now your template should look like this. (left picture is how your template should look when all except shading is selected and the right picture is when it has been selected to show. Also note that for the right picture i've created a folder to put it all in and called it UV-Maps. Doing this will mean that whenever I need the uv-maps later on when making skin or something. I can just click the little eye and have them show the guidelines for what I need.
That's it you're done with combining the head template for Second Life!!
The next template is the upperbody template. Again you need to make a new doc and make it 1024 x 1024 pixels. After having done the same steps (taking the layers etc.) your template should look something like this.
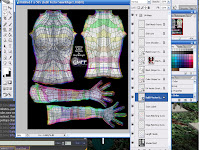
Save it as .psd and close it your upperbody template is complete.
Next template is the Lowerbody template. Again create a new doc 1024 x 1024 pixels - repeat the same steps as above for the lowerbody template. The final result should look something like this:
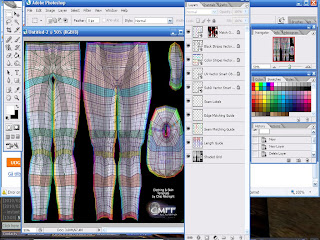
Save it as .psd and thats another template done. So on to the last one, the skirt template!!
Create a new doc again 1024 x 1024 pixels and repeat the steps from earlier and you should end up with something like this:
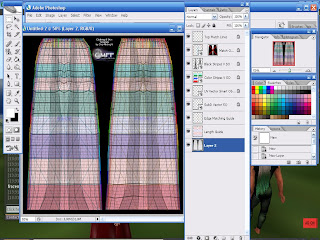
Save it as .psd and take a deep breath cause guess what??? You've just finished your preparation for making skin and clothes for Second Life!!!!!!!!
Well done!!!
If you have any questions or comments please let me know. I am new to blogging and tutorial writing - others have written tutorials and mine are bound to resemble them, but my goal is to let you all know how I've done and what have worked for me. This is part of it, and though it seems odd to combine the templates like this, it is a huge help when you make clothes :0)
Have Fun All!


